
Any how after 100's of signs and a little bit of podging experience here's an inexpensive way to get a really cool designer art piece using scrapbook paper, ModPoadge, MDF, and a few other things.
 |
| finished project |
Stage 1, cut your 1/2" mdf into 12"x12" squares (table saw works best but other saws can work as well). If your nice to the guy in the lumber department he'll probably hook you up and cut them for you. The number of squares will depend on your project size. I'm using 12 and going BIG!! 12pcs will require a 3x4' backer board, cut this out also at this stage. Say you only want 3 squares than an 8"x3' backer works good.
 |
| stage 1 cutting the 12" squares |
Stage 2, for every square you make you'll need a spacer block (don't skip this step because it adds the needed dimension that distinguishes a designer look. Using a 2x4 cut as many squares needed.
 |
| stage 2, cutting spacers |
Stage 3, rough sand the edges of your spacers so they paint easier and look nicer.
 |
| stage 3, sanding edges of spacers |
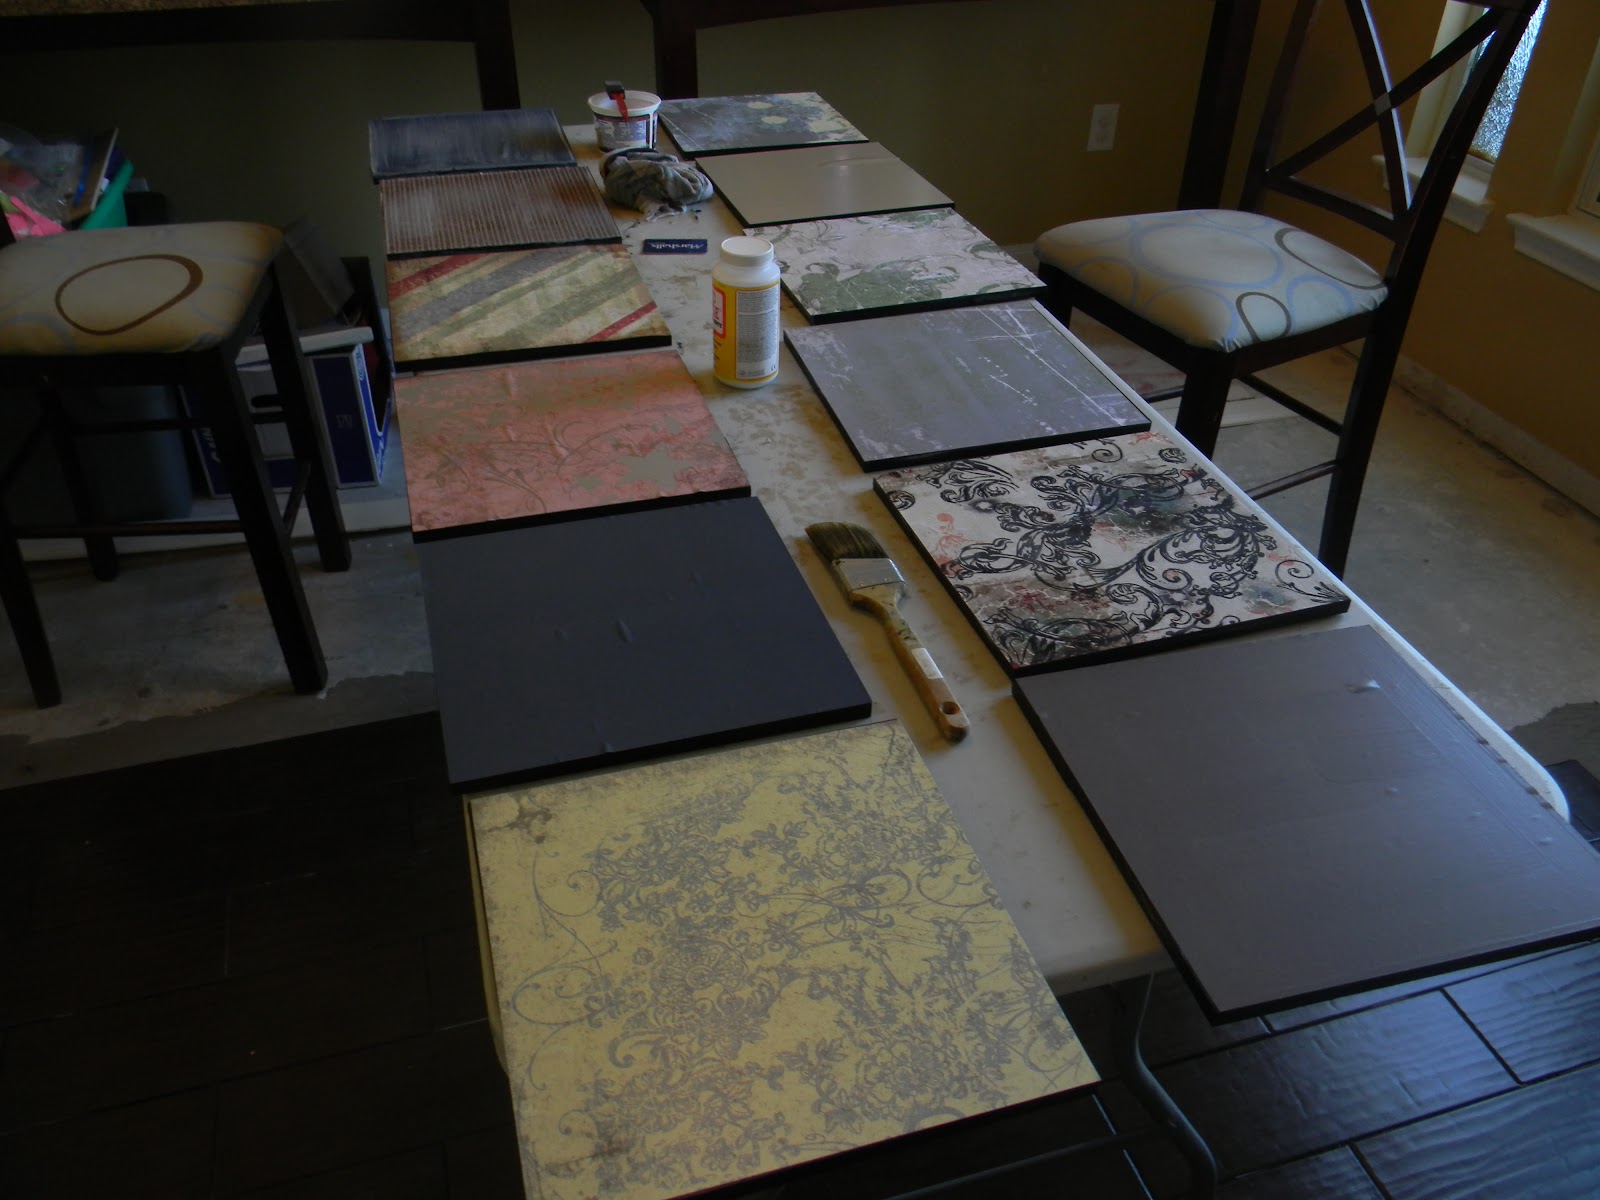
Stage 4, lay out the project for paint. I use flat black for lot's of my projects (this one's no exception) it's a go to paint for me so I always have a gallon on hand. When painting the 12" squares don't forget to paint the sides. The spacers only need the sides painted (you wont see the other area's). Also, paint your backer board also at this stage.
 |
| stage 4, painting out the project |
Stage 5, cut out your desired scrapbook paper into 12"x12" squares. You can also use wall paper instead giving your piece a more subtle designer look. I'm going bold with lot's of pattern and texture.
 |
| stage 5, cutting scrapbook paper into 12" squares |
Stage 6, after your painted mdf squares have dried it's time for Modpodging. Coat the top surface with podge using a cheap 1" foam brush, let sit a minute, then add your paper. Spread out paper with a credit card or something like that so your sure to get a flat good adhesion product. Next brush the sides with Podge to create a good seal and to minimize lifting. Let sit for a few moments to dry, then Podge the top of your squares and lay out to dry.
 |
| stage 6, ModPodge time |
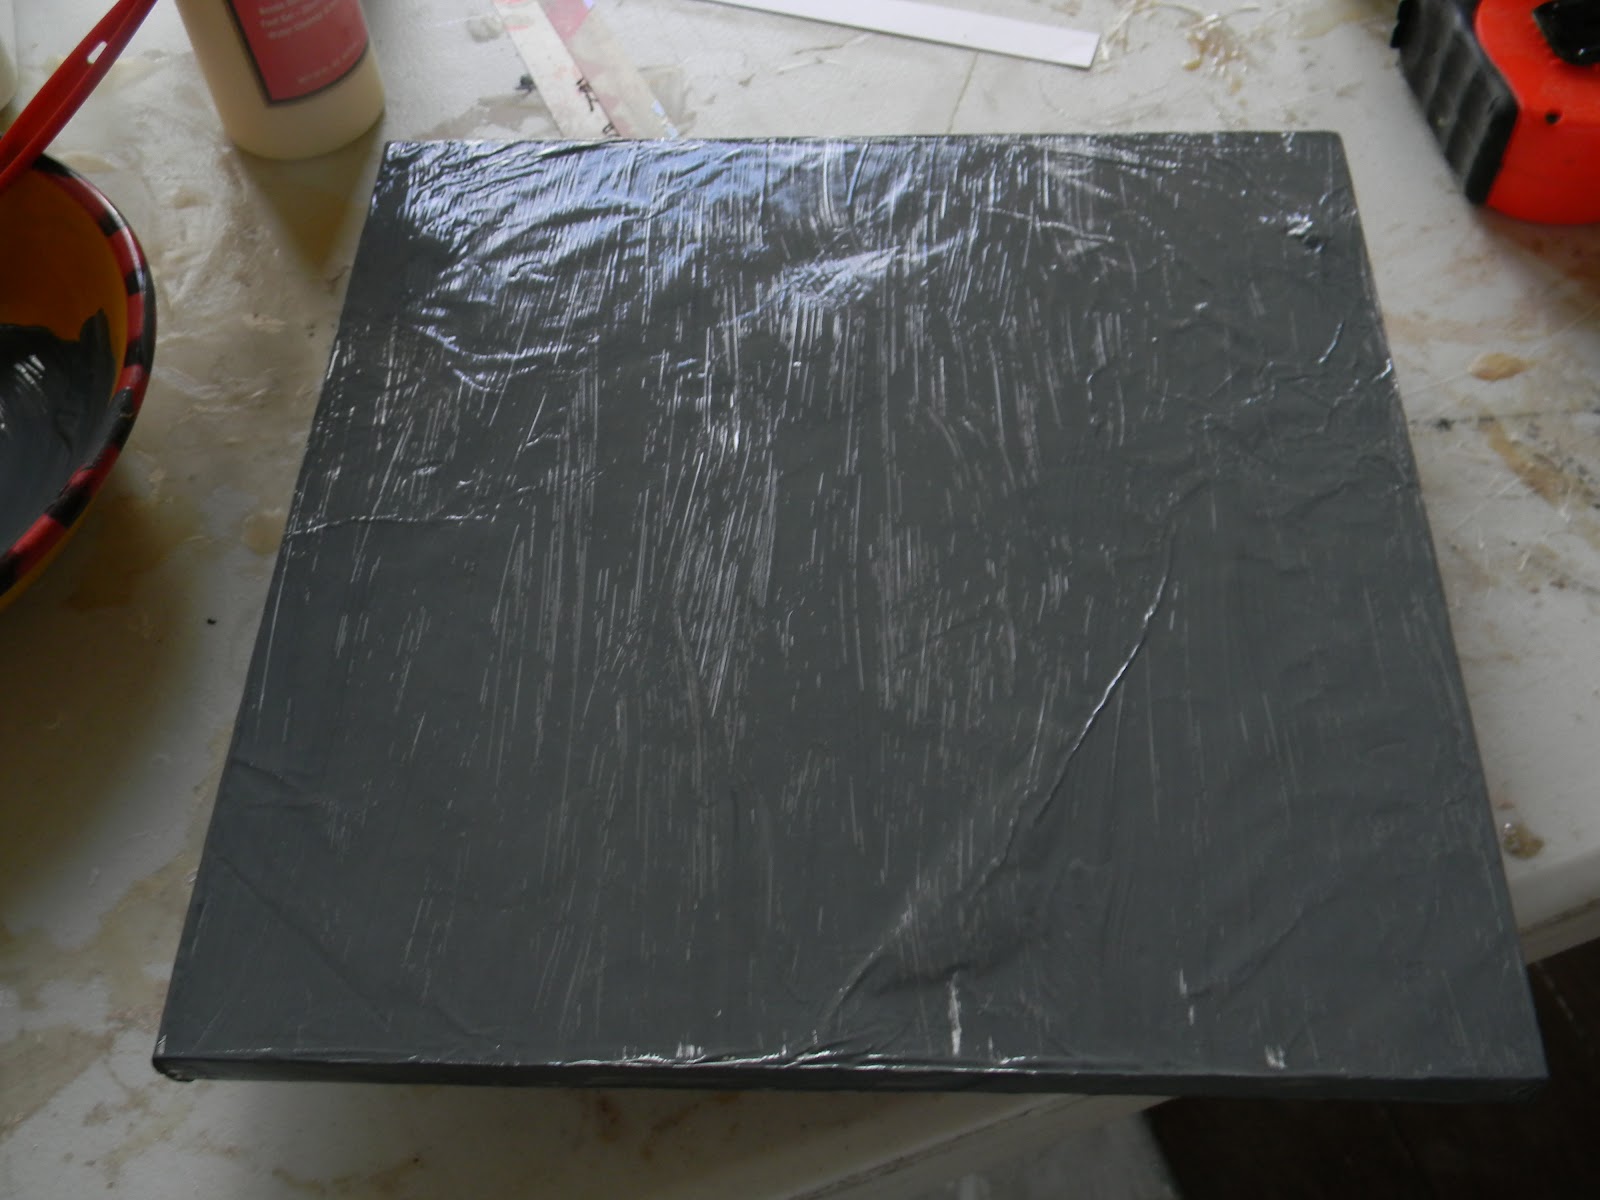
Stage 7a, adding a bit of bling if desired. If you choose this stage wrap a few of your 12"squares with aluminum foil (sides as well). ModPodge works well for adhering the foil to your squares. Let sit for a few moments to dry.
 |
| stage 7, adding bling |
Stage 7b, paint the entire foiled surface with a dark grey acrylic paint sides and all.
 |
| stage 7b, painting foil |
Stage 7c, before the paint dries get a clean rag and wipe off. Be sure to wipe lightly and evenly leaving behind paint in the creases.
 |
| stage 7c, wiping off paint creating a cool nickel effect |
Stage 8, polyurethane a top coat over all your finished 12"squares. This really gives the project a nice high end look so be sure not to skip. Allow the proper time for squares to dry.
 |
| stage 8, polyurethane the squares |
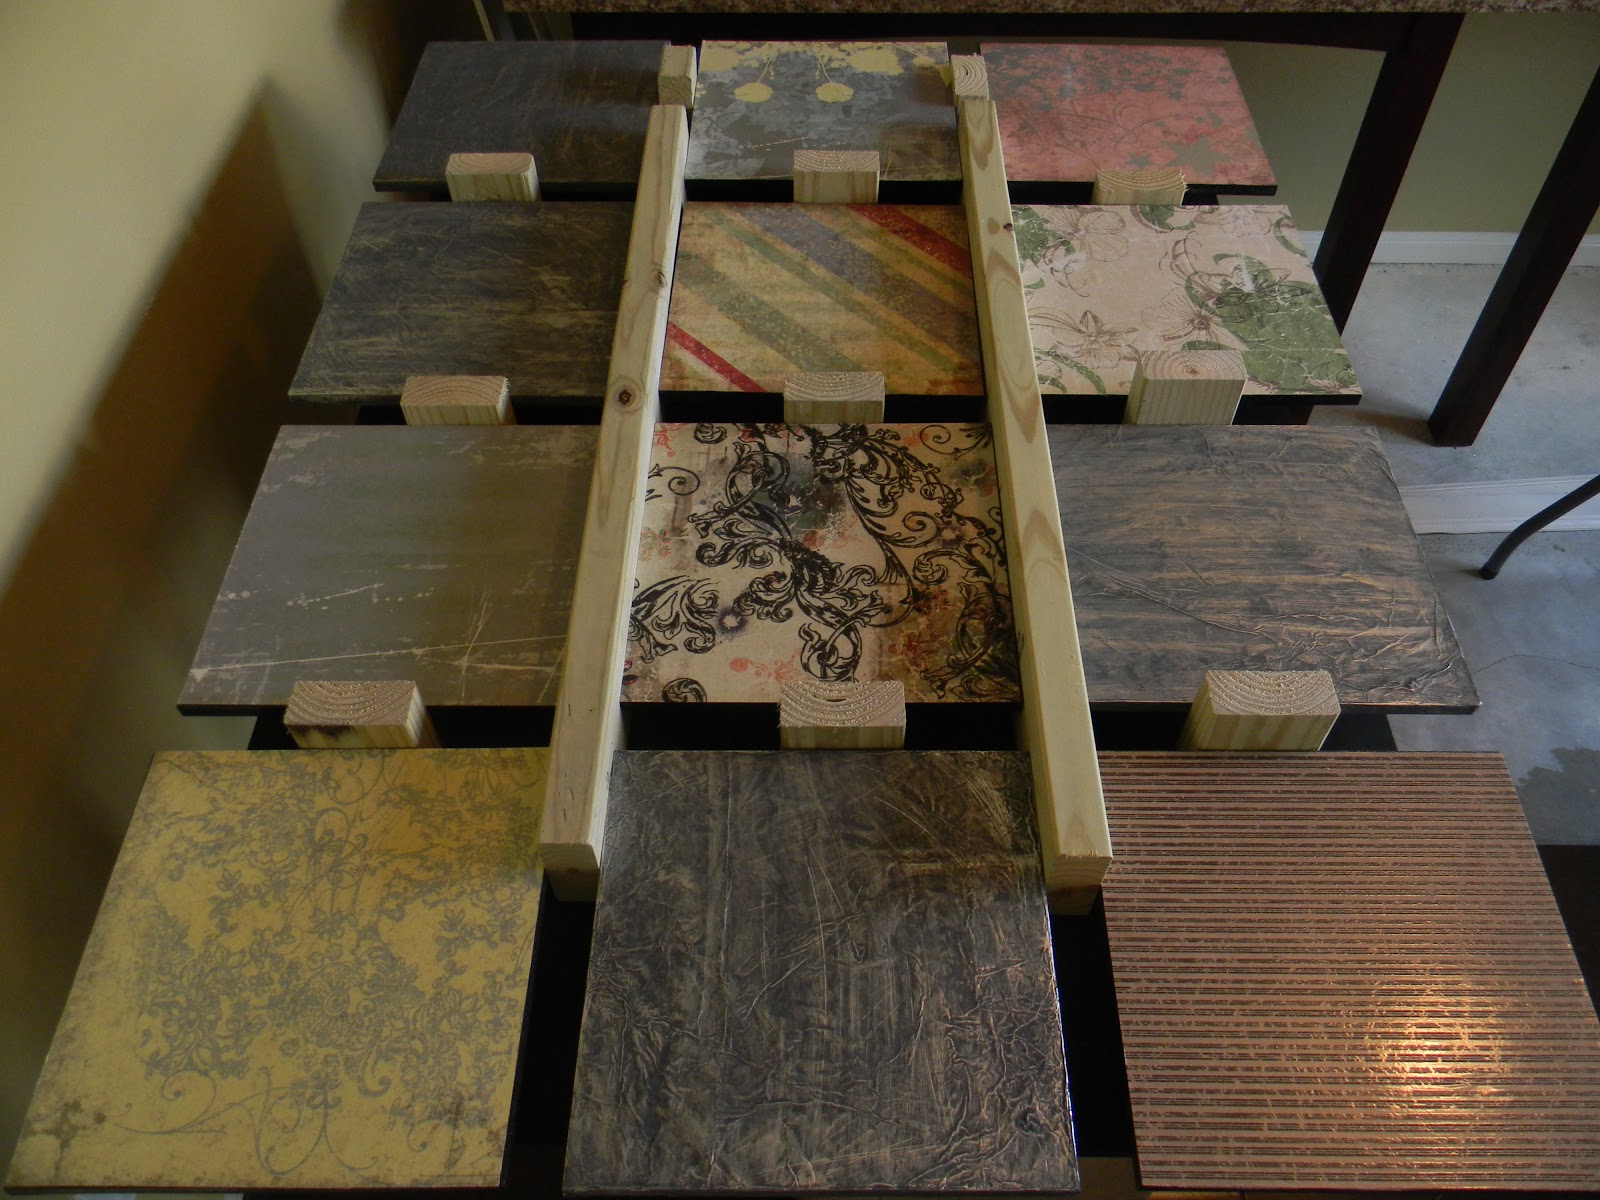
Stage 9, it's time to glue on the spacers (Be sure to use a high quality wood glue). A quick and easy way to find center in a square is to use a straight edge. Diagonally go from corner to corner and scribe the line. Put glue on your spacer and set each corner on the "X" line.
 |
| stage 9, adding the spacers |
Stage 10, lay out all your squares on your backer board. Use temporary cheat spacers like shown below to help you get the straight lines that are needed for this project to have some wow factor. Find center on your backer board and start with the middle square and work your way around. It can be eyeballed but it takes more effort and the results aren't as good. There's a couple of suggested ways to adhere the squares. If you have a nail gun use it because its easiest. If not be careful and individually glue each piece.
 |
| stage 10, laying out the squares |
Stage 11, remove all your temporary spacers. If you nailed with a gun your projects just about ready to be hung. If glued let it sit for at-lease 24hours before moving on. When ready to hang find center of mdf backer board and drill a through hole about 3" from edge. This will allow a single anchor (deck screw) in the stud to hold the piece balanced and level. It's heavy and will take two people to move. Remember not to grab or carry by 12" squares handle only by backer board.
 |
| stage 11, to hang or not to hang |
I love the look of this big, high style, designer diy piece, NICE!!
Wow...This is what i have been looking for and you have done a great job. Thanks for sharing.
ReplyDeleteScrapbook