There's something very cool about a piece of mid-century modern furniture. Maybe I'm drawn to its simplicity of function, mix of materials, or just the lines in its design. Whatever it is a piece from that period has a strong uniqueness about it that I often like to recreate (of course with my own spin).
This project the mid-century floor pendant started from a decomposing pile of oak branches near my daughters school.
 |
| the final product |
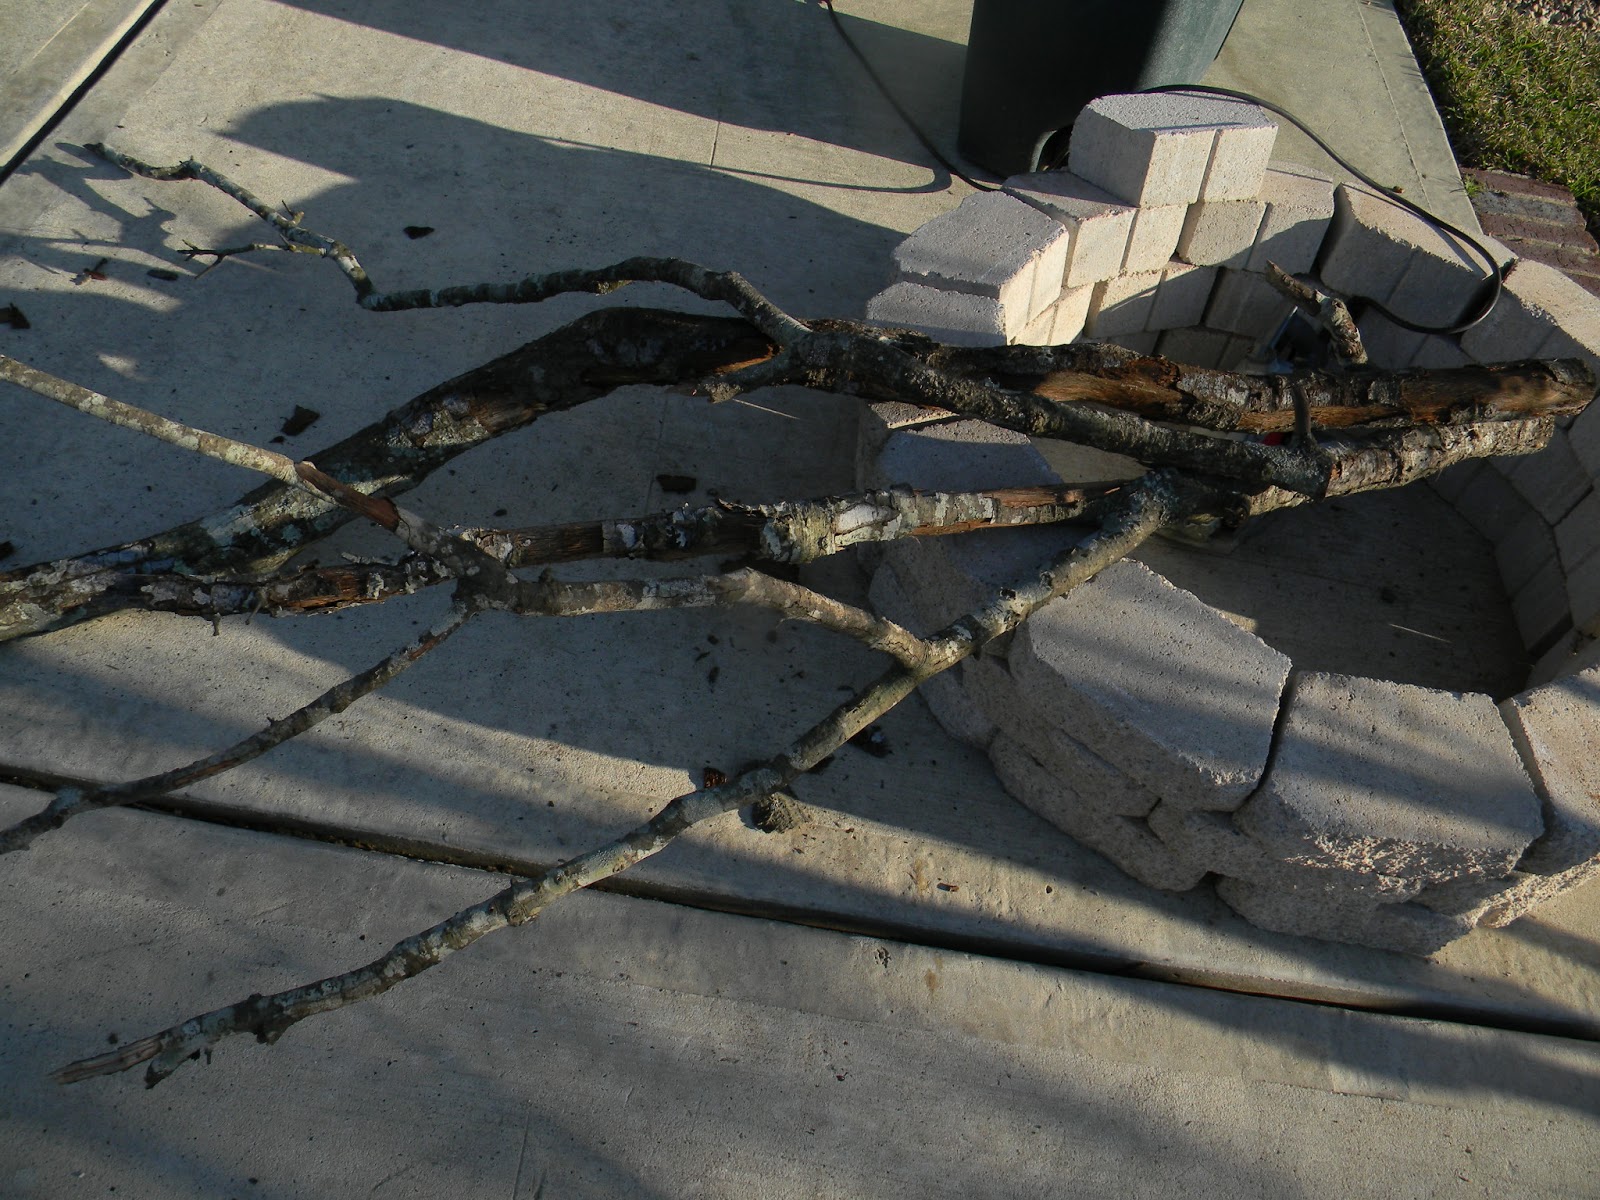
Stage 1, the find. Here's our oak branch pulled from the pile of decomposing branches. I use lots of oak for a couple of reasons it's readily available in my neck of the woods and once debarked it looks amazing.
Before grabbing your piece from the pile survey for critters and or anything else that might give you an unexpected bite.
 |
| stage 1 our find a beauty in the ruff. |
Stage 2, limbing and debarking. Cut off any excess branches that serve no purpose and start debarking. Hammer, pri-bar, and chisel are going to be your best tools for this process. Start from any end and get busy, some will come off easily, some not so easy. The stubborn bark will need to be removed with hammer and chisel.
 |
| stage 2, limbing and debarking |
 |
| stage 2, completely debarked |
Stage 3, sand out the entire branch. I use several pieces of 80 grit paper with a palm sander and it works pretty effectively. Once your satisfied with the over all look after sanding with 80 grit then re-sand with 150 grit until you reach a desired finish.
 |
| stage 3, sanding with 80 grit |
 |
| stage 3, branch after sanded with 150 grit |
Stage 4, time for polyurethane. This is the one of the most rewarding parts to the project. Polyurethane brings out all the incredible character that the piece is hiding. It will take at least 3 coats of poly in order to get a good finish. Let dry lightly sand and re-coat x3.
 |
| stage 4, first coat of poly |
 |
| stage 4, after 3rd coat of poly |
Stage 5, make the concrete base box. While our project is drying we can make the melamine box that will form the concrete base. We want our base about 12" wide x 15" long x 3" high. this should be more than sufficient to off set and counter balance the wieght of our branch. Be sure to use melamine material when making your form (the concrete doesn't bond to it). It's that white coated shelf material at the hardware store.
 |
| stage 5, cutting out the pieces |
 |
| stage 5, assembling the sides |
 |
| stage 5, what the form should resemble when done |
Stage 6, securing your project and getting ready for concrete. Add 3 eye screw to the base of your branch about 1 1/2" from bottom. The holes will allow the concrete to seep and settle through making sure the base grabs to the concrete after it's cured. Once you've set all the eye screws you need to make a fixture that will hold your project in place while you pour concrete. It doesn't have to be pretty it just needs to hold the project stable. The placement of the base is critical for a couple of reasons first be sure to place it so the concrete can counter balance the weight and second make sure your eye screws aren't to close to the edge where they become exposed.
 |
| stage 6, adding eye screws to the base |
 |
| stage 6, my crude fixture holding the project |
Stage 7, mix up the concrete. For this project I used a masons mix concrete it doesn't have aggregate. It's a bit more fragile but cleaner looking. If you don't like the color of cured concrete add a cement color as I did a deep charcoal. When your cement looks like thick pancake batter you're ready to pour. Slowly pour cement and spread out evenly with a margin trowel. After you have it some what flat use a palm sander to vibrate the form forcing all the air bubbles to the surface. I personally like the effect of the bubbles once they're popped they give the concrete character and interest. DON'T TOUCH FOR 48hrs!! It needs to cure.
 |
| stage 7, mixing your concrete and adding color |
 |
| stage 7, pouring concrete into the form |
 |
| stage 7, vibrating the sides to get the air out |
Stage 8, making the pendant. The pendant needs to be made out of a hard-wood in order to get the crisp clean mid-century modern lines. Walnut, oak, or poplar as I used. 1"x8"x6' poplar board cut to 14" length's (4pcs). Glue and nail in to a box, putty holes, sand down, and cut the relief's in any design you like. Sand again then stain or just polyurethane the pendant 3x's lightly sanding between coats.
 |
| stage 8, the 4pcs for the box |
 |
| stage 8, sanding the box |
 |
| stage 8, cutting a 1/4" relief vertically where box is bonded to each other (gives a cool look) |
 |
| stage 8, view after horizontal reliefs have been cut |
 |
| stage 8, drill a pilot hole and add mounting hardware (eye screws) |
 |
| stage 8, with hanging chain added |
Stage 9, open up the form and check out the concrete. I like to sand it a bit with an 80 grit just to break edges and clean the top a bit. Wipe down with a clean rag and then polyurethane it, be advised you'll want concrete counters after this.
 |
| stage 9, concrete base of fixture after poly |
Stage 10, add wire guides and light socket kit. About every 12-18' add an eye screw as a wire guide. Be sure to follow the natural flow of the branch so the screws and wire take a back seat to the branch itself.
 |
| stage 10, adding eye screws and wire socket kit |
 |
| stage 10, the base of the wire kit has a switch for easy on off |
 |
| stage 10, view of the simple socket light |
And Bam!! Here it is a very cool looking mid-century floor pendant that has big style without the heavy price tag of a genuine period piece.


No comments:
Post a Comment
Note: Only a member of this blog may post a comment.